


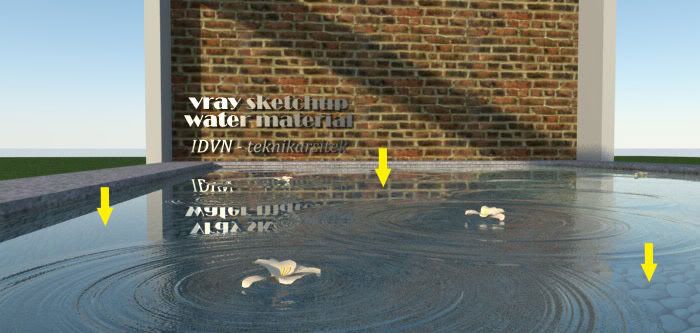
Below is the effect of bump ripples.

You can download Ferry's file HERE
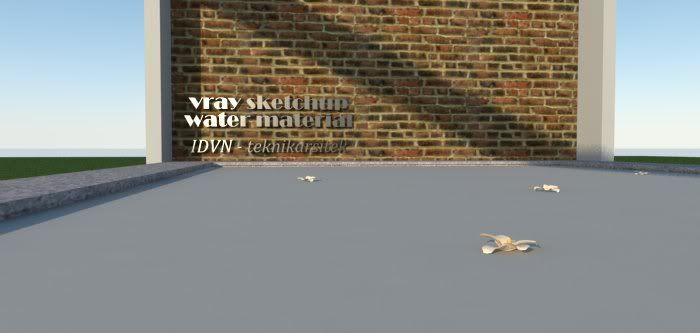
Step 1: The SketchUp Scene
Step 2: The Water Ripple Material.
This is the water material. It will be loaded in both diffuse and bump slot.

Step 3: Re-scaling the Map
Once the map has been applied as diffuse material. You can rescale and adjust the position in SketchUp. In the image below, the center of the water ripple was position under the floating flower.
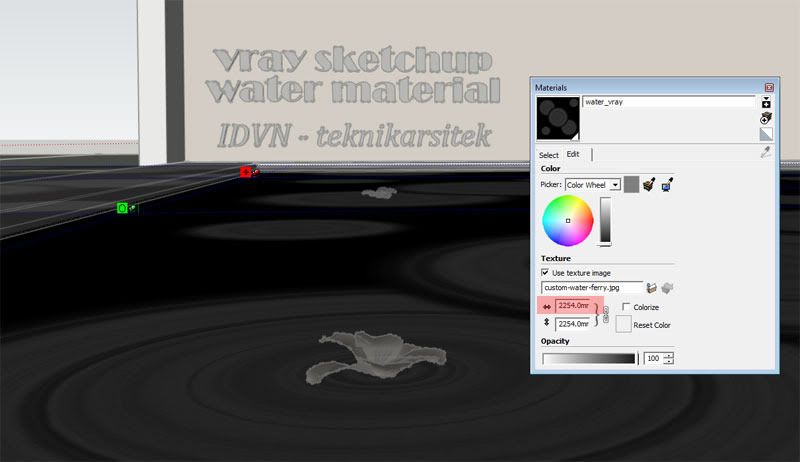
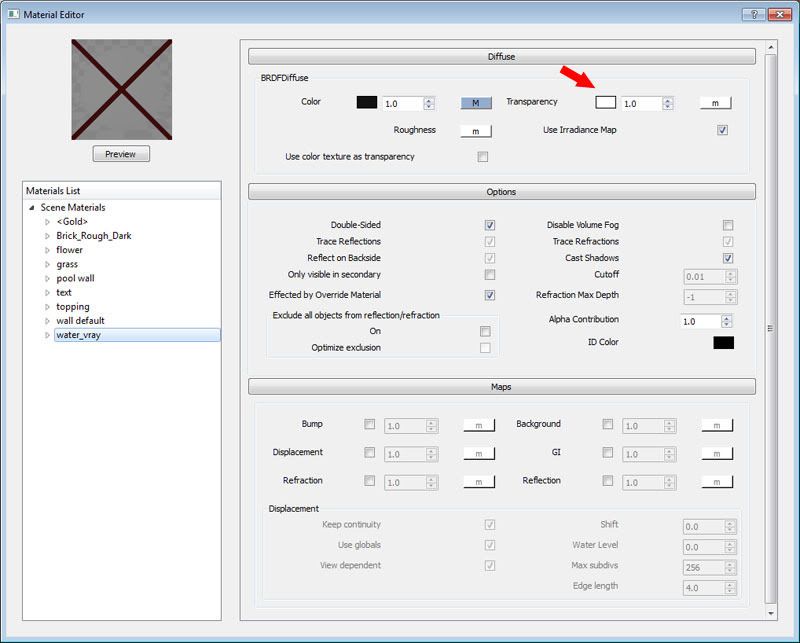
Step 4: Transparency.
The transparency of the water material was adjusted to "white". It means the water is 100% transparent.
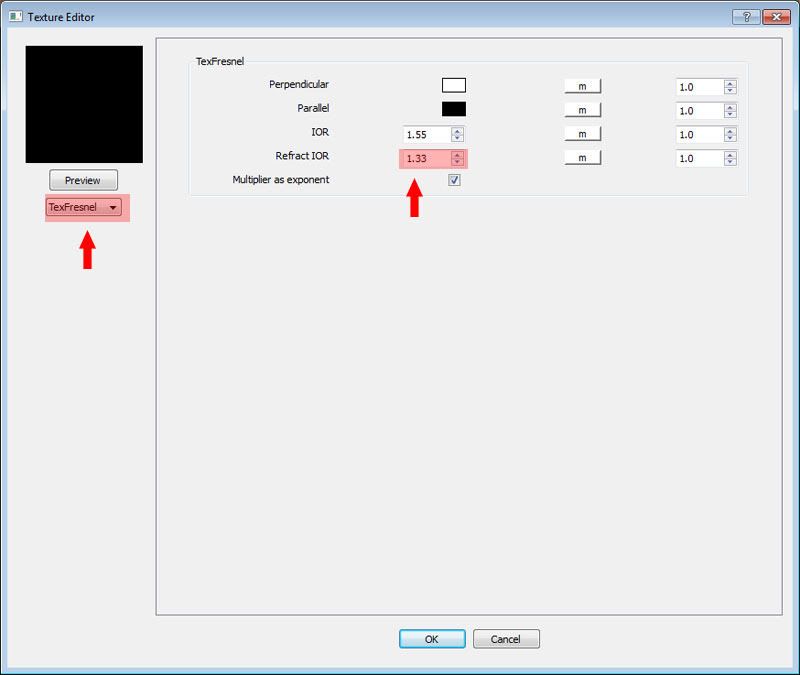
Step 5: Vray Reflection setting of the water
In Vray, you need to apply reflection layer, use Fresnel map type and adjust the Index of Refraction (IOR) to 1.33.
Step 6: Refraction layer
Create Refraction Layer for the water material. To do is, right click and add refraction layer. Set the color to white and enter a color multiplier of 0.05 with Affect alpha and Affect Shadows on.

Step 7. The Bump shader
Click the bump slot and load the same diffuse map on this slot. Do not change anything. Below shows the ripple effect. But some of the areas are so static.
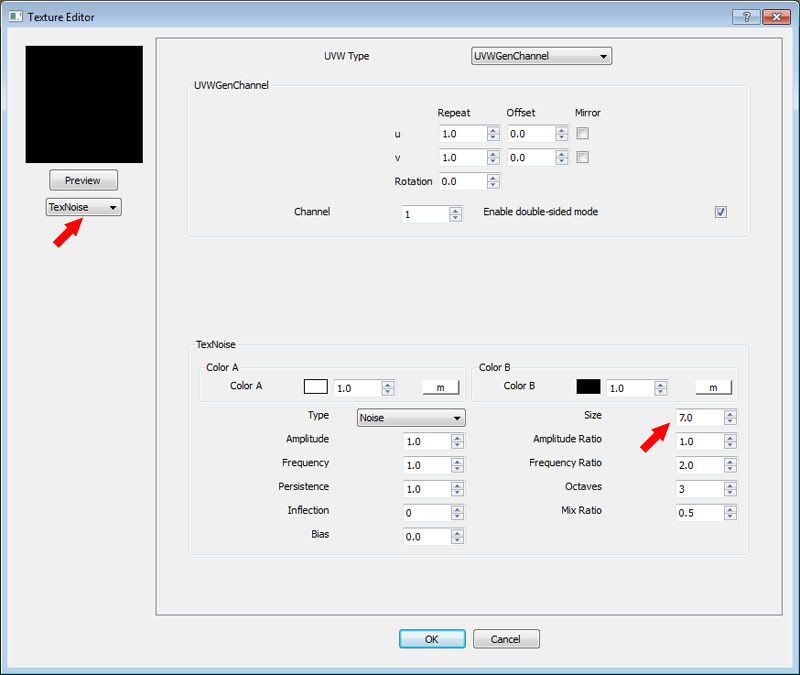
7. Noise displacement
In order to disturb the water surface, create a subtle displacement using "Noise texture". Below is the Noise texture displacement setting.
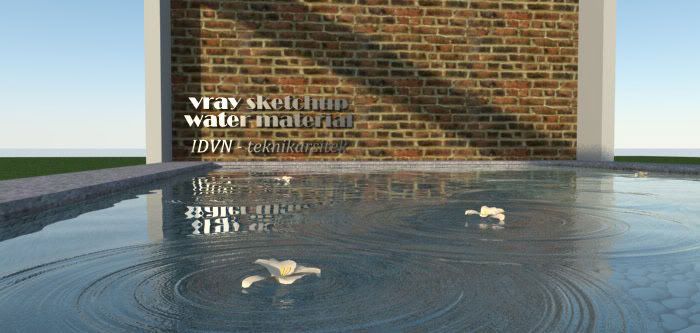
Now the water surface was displaced showing a much realistic effect.
0 komentar:
Posting Komentar